Find the Top-Rated Garage Door Company for Your Needs in Broomfield, CO

Looking for the best Broomfield, CO, garage door company near you? We provide fast, reliable, and affordable services for all your garage door needs. Making the right choice when selecting a garage door company can save you time, money, and frustration. Whether you need a new installation or a repair, finding a reliable service provider ensures your new garage door runs smoothly and safely. But with so many companies out there, how do you know which one is the best fit for your needs? In this blog, we’ll cover key factors when choosing a garage door company. From checking their reputation to ensuring they offer a wide range of services, this guide will help you make an informed decision. Additionally, we’ll touch on the importance of professional expertise for handling such a vital part of your home. Keep reading for tips on hiring a trustworthy company that prioritizes quality, safety, and customer satisfaction, ensuring your garage door works seamlessly for years to come. The Role of a Garage Door Company in Home Maintenance A garage door company isn’t just about installing a new door or fixing a squeaky one. These companies provide a range of services designed to enhance your garage’s functionality, safety, and aesthetics. In addition to installation and repairs, they offer consultations to help homeowners select the right products, conduct safety inspections, and perform regular maintenance. But the benefits don’t stop there. A reliable garage door company helps ensure that your garage door—the largest moving part in most homes—functions optimally and safely. They bring specialized knowledge and the right tools to handle any garage door issue, which can save you from costly mistakes or even dangerous DIY fixes. The Importance of Hiring a Professional Garage Door Service You might be tempted to tackle minor garage door issues on your own, but hiring a professional garage door company has several significant advantages. Here’s why you should consider leaving these tasks to the experts. 1. Specialized Knowledge and Experience A professional garage door company has technicians with years of experience handling all garage door issues. They’ve seen it all, whether it’s a broken spring, misaligned tracks, or an uncooperative opener. Their deep understanding of how each component works together allows them to quickly diagnose and repair problems that might leave a DIY enthusiast stumped. You’re not just paying for the labor; you’re paying for the expertise. 2. Ensuring Safety Let’s be honest—garage doors are heavy, and the springs that balance them are under immense tension. One wrong move while fixing a broken spring or cable could lead to serious injury. Professional garage door companies prioritize safety, ensuring all repairs are performed with the proper tools and techniques to avoid accidents. By hiring a professional, you’re protecting your property, yourself, and your family. 3. Guaranteed Quality Work One of the biggest benefits of hiring a garage door company is the assurance that the job will be done right the first time. Many companies offer warranties on their work, meaning if something goes wrong after a repair or installation, they’ll return to fix it at no additional cost. This level of quality assurance gives you peace of mind that your garage door will function smoothly for years to come. 4. Quick and Efficient Service What might take you an entire weekend to troubleshoot and fix could take a professional only a few hours. Professional garage door companies have the training and tools to do the job quickly, minimizing disruption to your daily life. Instead of wrestling with a faulty door opener or misaligned tracks, you can trust the experts to handle the problem swiftly and efficiently. 5. Long-Term Savings While it might seem cheaper to tackle garage door repairs on your own, a small mistake could cost you much more in the long run. For instance, installing the wrong type of spring could lead to further damage, requiring more expensive repairs. A professional garage door company ensures that the right parts and techniques are used, which can save you money in the long run. What to Consider When Hiring a Garage Door Company Not all garage door companies are created equal, so it’s essential to do some research before hiring one. Here are some key factors to keep in mind. 1. Checking Reviews and Reputation Reputation is everything in the service industry. Look for a company with positive online reviews and a solid reputation in your local community. You can check Google, Yelp, or even ask for referrals from friends and family. A company with glowing reviews is more likely to provide reliable, high-quality service. 2. Verifying Licenses and Insurance Before signing on the dotted line, ensure the garage door company is properly licensed and insured. Licensing ensures that the company complies with local regulations and industry standards, while insurance protects you in case of accidents or property damage during the service. 3. Assessing Service Options A reputable garage door company should offer a broad range of services. From installing brand-new garage doors to conducting regular maintenance, they should be able to handle all aspects of garage door care. This versatility ensures you won’t have to juggle multiple companies for different services. 4. Availability of Product Choices Garage doors come in various styles, materials, and features. Whether you’re interested in a classic wood door, a sleek steel model, or an insulated option for energy efficiency, the company should provide various products. The more options available, the easier it is to find a garage door that suits your home’s design and personal preferences. 5. Evaluating Customer Support A company’s customer service can tell you a lot about how they value their clients. Pay attention to how responsive they are when answering questions or providing quotes. A reliable garage door company should prioritize customer satisfaction, offering clear communication, helpful advice, and a friendly approach throughout the process. 6. Asking for Free Estimates Many professional garage door companies offer free estimates, which can greatly help when budgeting for a new installation or repair. Don’t
Affordable Garage Door Spring Replacement Services Near Broomfield, CO
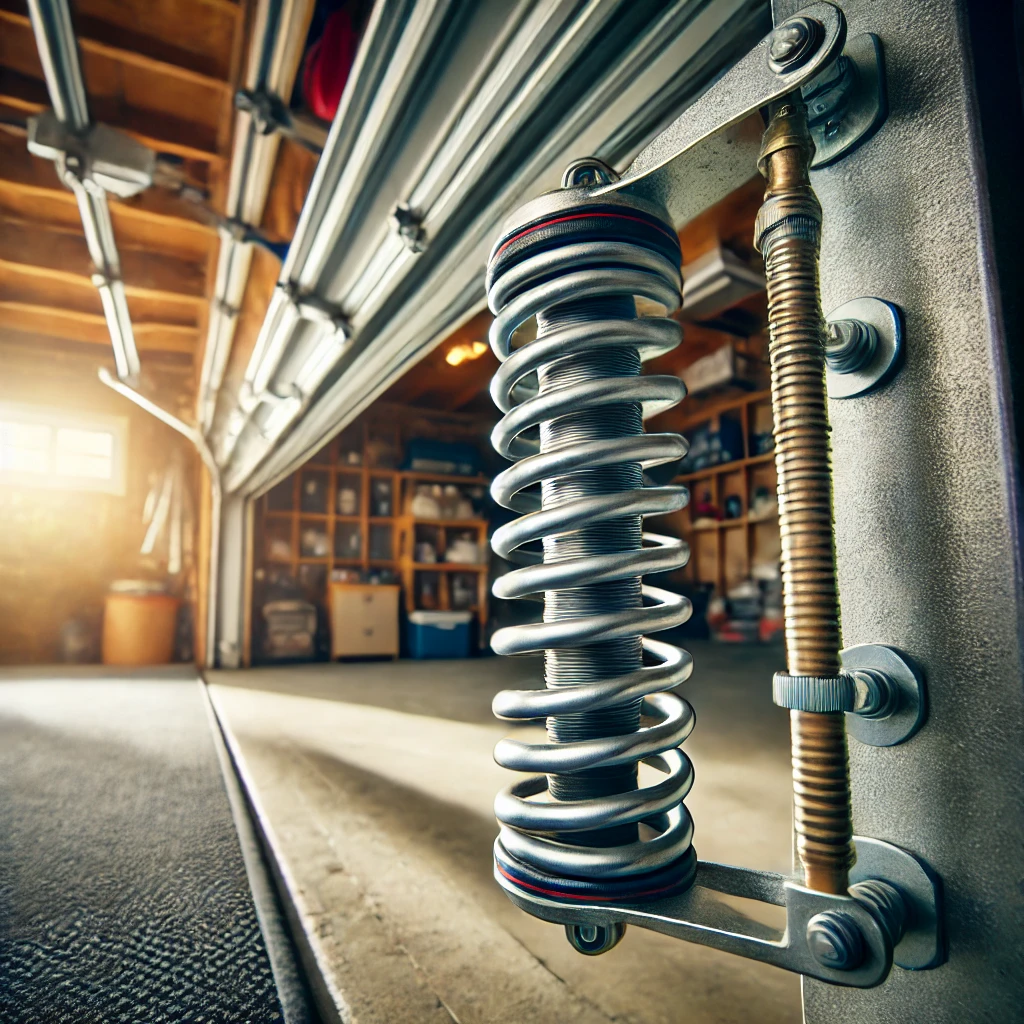
Need a reliable garage door spring replacement in Broomfield, CO? Find affordable services near you with quick response times and expert solutions. Most homeowners only think about garage door spring replacement once their garage door starts acting up. Imagine you’re running late for work one morning, only to find your garage door won’t budge. It can be stressful, but this guide walks you through everything you need to know about replacing garage door springs safely. Whether you’re dealing with the more straightforward extension springs or the complex, high-tension torsion springs, this guide breaks down each step. The blog explains how to identify when a replacement is necessary, the different types of springs, and the safety precautions to remember. It also covers the necessary tools and common troubleshooting tips after installation. So, if you’re looking to tackle this project independently, keep reading for a detailed, step-by-step process that’ll have your garage door running smoothly again in no time. Types of Garage Door Springs Understanding the spring type is essential when dealing with garage door spring replacement. Two main types of springs are used in new garage doors: extension and torsion springs. Extension Springs Extension springs are common in lightweight residential garage doors. They run along the sides of the garage door track and expand or stretch as the door closes. These springs provide the necessary tension to balance the door and assist in lifting it. Replacing extension springs is relatively easier than torsion springs, but due to their tension, care must still be taken. Torsion Springs Torsion springs are generally used in heavier garage doors. Mounted horizontally above the door, these springs twist as the door moves. They offer more control and durability than extension springs but are more dangerous to replace because they are under extreme tension. A mistake while handling torsion springs can cause serious injury, so many homeowners opt for professional installation. Signs Your Garage Door Springs Need Replacement Garage door springs wear out over time, and knowing when to replace them can prevent more significant issues. Here are some telltale signs that your garage door spring replacement is due: Visual Indicators Look for noticeable signs of damage. If you see that the springs have gaps between their coils, are rusted, or appear stretched out, they are likely near the end of their lifespan. A broken spring can also cause the garage door to stop working suddenly. Garage Performance Issues Pay attention to how your garage door operates. If it suddenly becomes difficult to open, makes loud noises during operation, or feels heavier than usual, these are strong indicators that the springs are failing. If the door opens unevenly or stops halfway, this may also be a sign of spring problems. Don’t ignore these signs; continuing to operate a garage door with faulty springs can lead to more significant and costly repairs. Safety Considerations for DIY Garage Door Spring Replacement Attempting a garage door spring replacement yourself can save you money, but it can also be risky. These springs are under high tension and can cause serious injuries if mishandled. Always prioritize safety during the replacement process. Protective Gear Before starting, ensure you have the proper protective gear. Safety glasses protect your eyes from potential spring snaps, and gloves protect your hands from cuts and abrasions. Additionally, wearing long sleeves and heavy-duty clothing is essential to minimize the risk of injury from flying debris or tools. Secure the Garage Door Always disconnect the garage door opener and secure the door in place using C-clamps or locking pliers before working on the springs. This will prevent the door from accidentally moving, which could cause injury or damage. Proper Lifting Techniques Lifting a garage door manually can strain your back and arms. If you need to lift the door manually to relieve tension on the springs, ensure that you use proper lifting techniques—bend your knees, not your back. Use assistance if needed to avoid injury. How to Replace Extension Springs on a Garage Door If your garage door uses extension springs, follow these steps to ensure a safe and successful garage door spring replacement. Tools and Equipment Needed Measure and Purchase New Springs Before removing the old springs, measure their length and gauge. Note their color code, which usually indicates the weight capacity. Using the wrong size spring for your garage door can lead to poor performance or damage. Installing New Extension Springs How to Replace Torsion Springs on a Garage Door Replacing torsion springs is more complex and dangerous than replacing extension springs. Here’s how to do it safely: Tools and Equipment Needed Measure and Buy New Springs Before purchasing new torsion springs, measure the length, diameter, and gauge of the old springs. Incorrect sizing can result in improper door function or increased wear and tear on the new springs. Installing New Torsion Springs Troubleshooting Common Issues After Garage Door Spring Replacement After completing your garage door spring replacement, you may encounter some common issues. Here’s how to handle them. Garage Door Balance Problems If the door seems unbalanced after the replacement, it could be due to uneven spring tension. Check that both springs are wound evenly and that the door remains level when lifted manually. Spring Tension Adjustments If the door doesn’t open fully or closes too quickly, you may need to adjust the spring tension. Use your winding bars to make small adjustments, adding or removing tension until the door operates correctly. Be cautious while doing this to avoid injury. When to Call a Professional for Your Garage Door Spring Replacement While DIY garage door spring replacement is feasible for many homeowners, there are situations where it’s better to call in a professional. Here are a few instances where expert help is recommended: Complex Installation Scenarios If your garage door has multiple springs or is particularly heavy, replacing the springs may be too complex to handle independently. In such cases, a professional technician will have the expertise and tools to perform the replacement safely and efficiently.
Emergency Hack: How to Open Garage Door Manually from Outside!
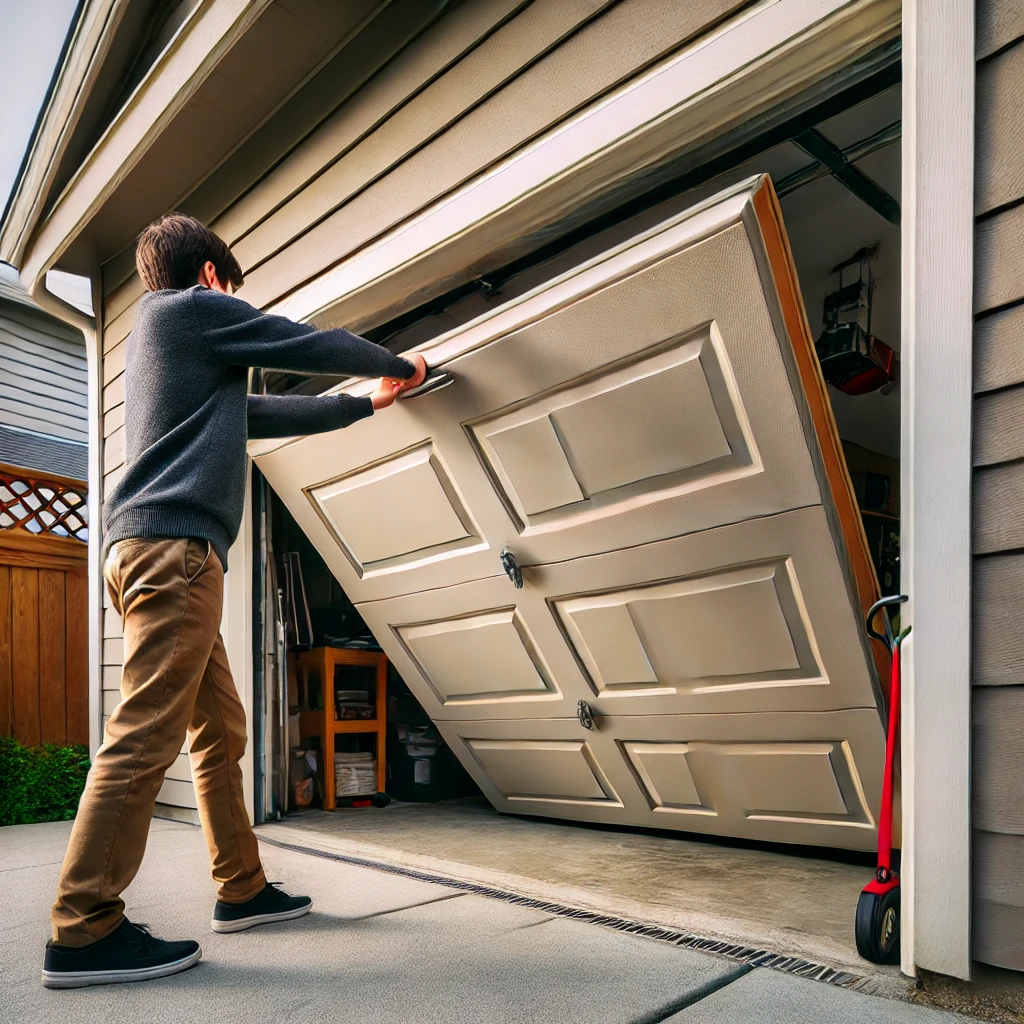
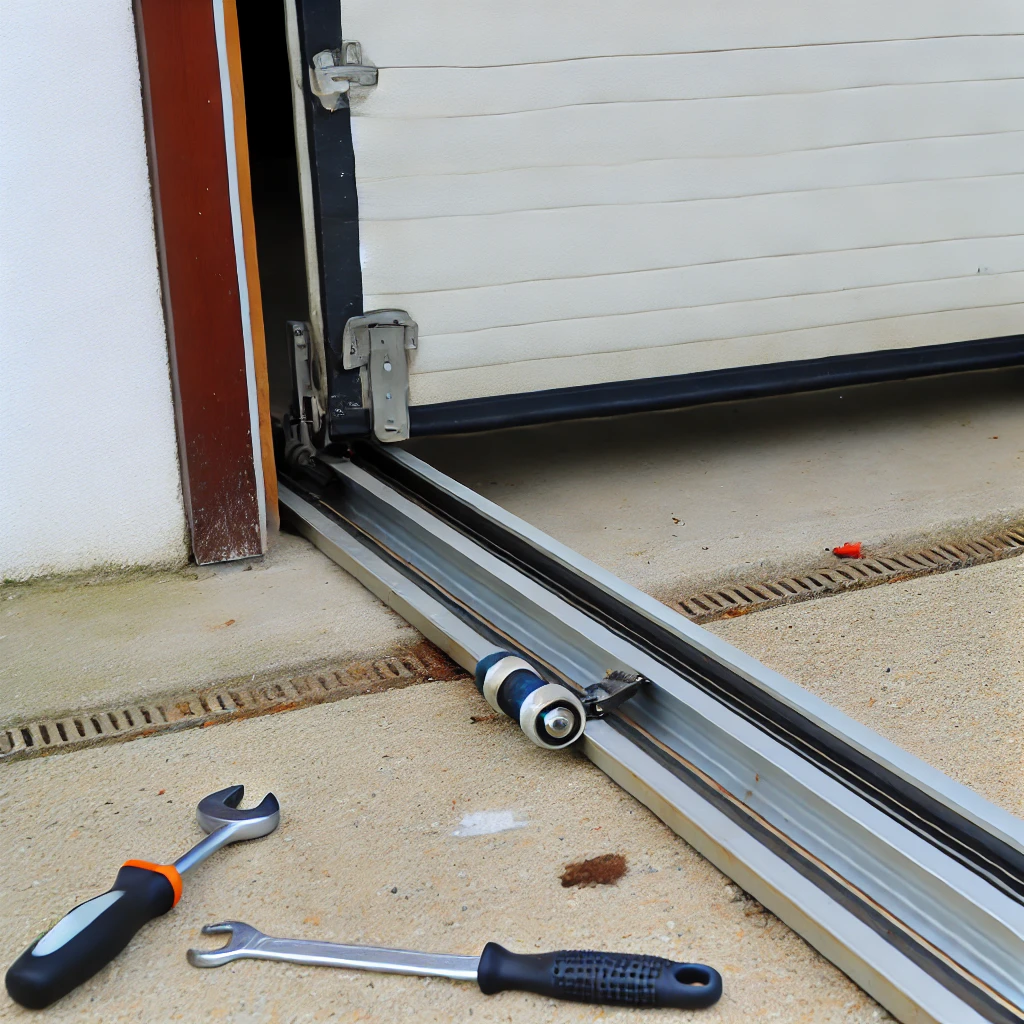
Finding yourself unable to open your garage door from the outside can be frustrating and stressful, especially during a power outage or when your remote isn’t working. Knowing how to open your garage door from the outside manually can prevent you from being locked out and ensure you maintain access to your home in any situation. This guide walks you through the process step-by-step, starting with understanding the basic mechanics of your garage door and the tools you’ll need. You’ll learn how to locate and use the emergency release kit, disengage the door from the opener, and safely lift and secure the door. These steps are straightforward but crucial for ensuring you can open the door without damaging it or injuring yourself. Whether you’re dealing with a power outage, a malfunctioning opener, or just misplaced your remote, keep reading to learn how to manually open your garage door from the outside efficiently and safely. Understanding the Mechanics of a Garage Door Before you attempt to open your garage door manually, it’s important to understand the basic mechanics of how garage doors operate. Most residential garage doors operate on a system of torsion or extension springs that counterbalance the door’s weight, making it easy to open and close, either manually or with an electric opener. When the electric opener is engaged, it pulls the door along tracks using a chain, belt, or screw drive mechanism. If a power outage or malfunction occurs, the door can be disengaged from the opener to be operated manually. Assessing the Situation Before opening your garage door manually, it’s important to assess the situation to determine the best course of action. Power Outage vs. Mechanical Failure Determine whether the issue is due to a power outage or a mechanical failure. If the power is out, the door opener will not function, but the garage door should still be manually operable. If there’s a mechanical failure, such as a broken spring or damaged track, the door may be unsafe to open manually, and you should consider contacting a professional. Accessibility Check whether you have an emergency release kit installed. This kit, often consisting of a lock and cable, allows you to disengage the garage door opener from the outside. If you don’t have one, you may need to access the garage from another entry point, such as a side door, to disengage the opener from the inside. Gathering the Tools and Materials Opening a garage door manually from the outside typically requires a few basic tools and materials. Make sure you have the following on hand: Steps to Manually Open a Garage Door from the Outside If you’ve determined that it’s safe to proceed and you have the necessary tools, follow these steps to open your garage door from the outside manually: Step 1: Locate the Emergency Release Kit If your garage door has an emergency release kit installed, locate it near the top of the garage door. It’s usually a small lock with a keyhole. Insert the key into the lock and turn it to release the handle. Step 2: Access the Emergency Release Cable Once you’ve unlocked the emergency release kit, pull the handle to engage the emergency release cable. This cable is connected to the trolley, which disengages the door from the opener, allowing you to lift the door manually. Step 3: Lift the Garage Door After disengaging the opener, carefully lift the garage door by grabbing it from the bottom. The door may be heavy, especially if the springs are not in good condition. To avoid injury, use your legs to lift rather than your back. Lift the door slowly and steadily until it’s fully open. Step 4: Secure the Door in the Open Position If you need to keep the door open for an extended period, prop it up with a sturdy object. If the door has a built-in locking mechanism, use it to secure the door in place. This will ensure the door won’t accidentally fall, which could cause injury or damage. Step 5: Close the Door Manually When you’re ready to close the door, carefully lower it by hand. Ensure you have a firm grip on the door and lower it slowly to prevent it from slamming shut. If the door is heavy or difficult to control, ask for assistance to avoid injury. Troubleshooting Common Issues Sometimes, even when following the correct steps, you may need help with manually opening your garage door. Here are some common problems and how to address them: Garage Door is Hard to Lift The springs may be worn or broken if the door is difficult to lift. The springs counterbalance the door’s weight, so if they’re not functioning properly, the door will feel very heavy. In this case, it’s best to contact a professional to repair or replace the springs. Emergency Release Cable is Not Disengaging the Door If pulling the emergency release cable doesn’t disengage the door from the opener, the cable might be jammed or broken. Check for any visible issues with the cable and try gently pulling it again. If it’s still not working, you may need to access the garage inside to manually disengage the door or call a technician. Door Won’t Stay Open If the door won’t stay open, it could be due to a malfunctioning spring or an off-balanced door. Try propping the door open with a sturdy object, but avoid placing yourself or any valuable items under the door until it’s been properly repaired. Safety Tips and Best Practices Manually opening a garage door can be dangerous if not done correctly. Here are some safety tips and best practices to keep in mind: Frequently Asked Questions (FAQs) Can you open an automatic garage door manually from the outside? Yes, you can manually open an automatic garage door from the outside, typically using an emergency release kit. This involves unlocking the door using a special key and pulling the release cable to disengage the opener, allowing you
Think You Know the 2-Car Garage Door Replacement Cost? Think Again!
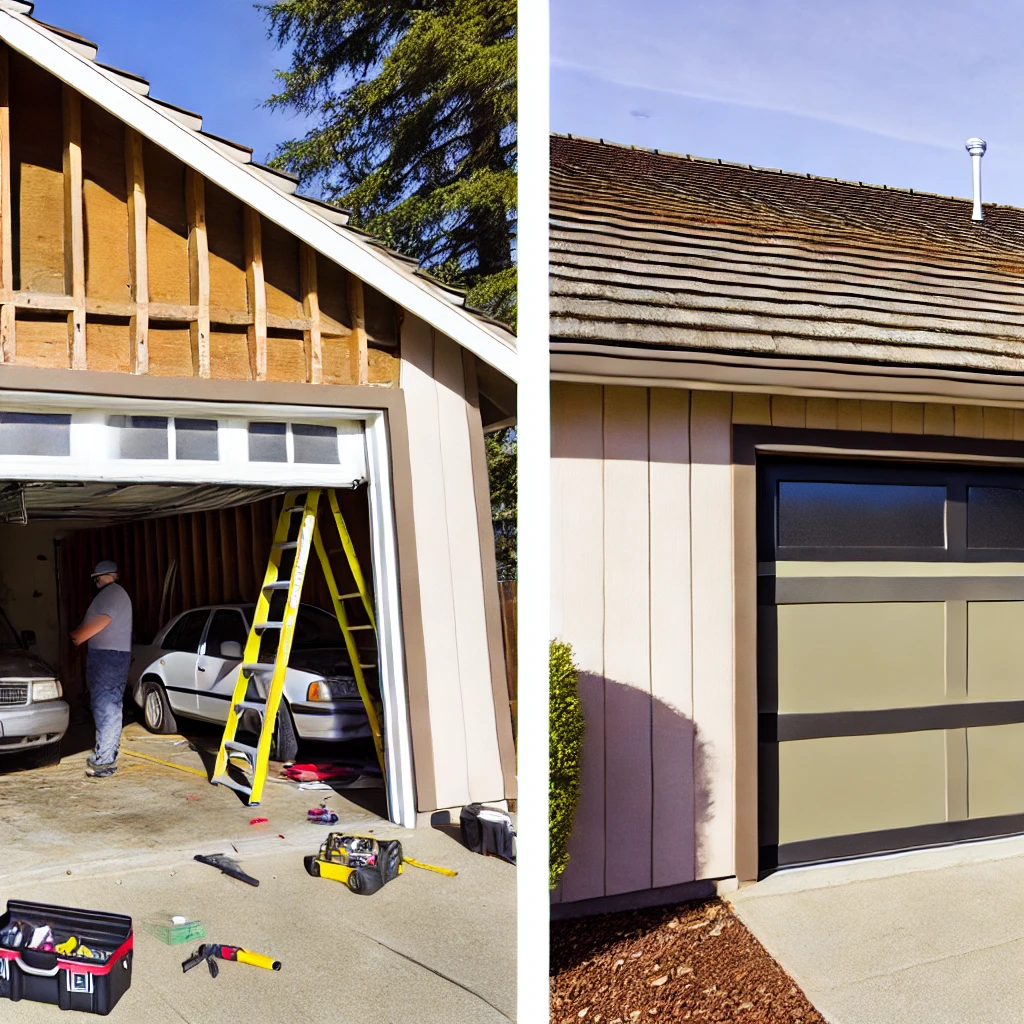
Replacing a 2-car garage door is more than just a home improvement project; it’s an investment in your home’s security, energy efficiency, and curb appeal. However, the cost of this upgrade can vary widely based on several factors, making it essential to understand what influences the final price tag. From the type of material you choose to the complexity of installation and additional features, many elements come into play when determining the cost of a garage door replacement. In this guide, we’ll break down the key factors that impact the cost, such as the choice between steel, wood, or vinyl doors, each offering different benefits and price points. We’ll also discuss the costs associated with professional installation and potential add-ons like insulation, windows, and smart technology that can further drive up the expense. Whether you’re aiming for a budget-friendly option or a high-end custom design, keep reading to explore the full range of costs and considerations involved in replacing a 2-car garage door. This guide will help you make an informed decision that suits your needs and budget. Factors That Influence the Cost of a 2-Car Garage Door Replacement The cost of replacing a 2-car garage door is influenced by various factors, including the type of material, the complexity of the installation, and any additional features you choose. Here’s a closer look at these factors: 1. Garage Door Material The material you choose for your new garage door is one of the most significant factors affecting the overall cost. Each material offers different durability, maintenance, and insulation benefits, which can impact the price. 2. Installation Costs Installation is another significant component of the overall cost. Professional installation ensures your garage door is properly aligned, balanced, and safe to use. The complexity of the installation can vary depending on the type of door and the condition of your existing garage door system. 3. Additional Features and Customization The cost of a 2-car garage door replacement can increase based on additional features and customization options you choose. 4. Removal and Disposal of Old Door Don’t forget to factor in the cost of removing and disposing of your old garage door. Professional installers include this service in their overall installation fee, but it’s important to confirm. If it’s an additional service, you can expect to pay between $50 and $200 for the removal and disposal. 5. Geographic Location Your geographic location can also influence the cost of a 2-car garage door replacement. Areas with higher costs of living or remote locations may have higher labor costs and material prices. Additionally, some regions may require specific building codes or permits, adding to the overall expense. Average Cost Breakdown for a 2-Car Garage Door Replacement Replacing a 2-car garage door can vary widely in cost depending on the installation’s material, features, and complexity. Below is a more detailed breakdown of what you can expect to pay for different types of garage doors, including material and installation costs. Basic Steel Door Insulated Steel Door Wood Door Aluminum Door Fiberglass Door Vinyl Door Tips for Saving on Garage Door Replacement While replacing a 2-car garage door is a significant investment, there are ways to save on the overall cost without compromising on quality: Frequently Asked Questions (FAQs) How much should you spend on a garage door? The cost of a garage door can vary widely depending on the material, size, and design. A two-car garage door can cost between $600 and $2,500 or more. High-end options like custom wood or insulated steel doors can cost $3,000. What is the cheapest garage door option? The cheapest garage door options are typically single-layer steel doors, which can cost as little as $300 to $500 for a standard-sized door. These budget-friendly doors offer minimal insulation and may be less durable than higher-end models. What size garage door for a 2-car garage? A standard size for a two-car garage door is 16 feet wide and 7 feet tall. This size is ideal for accommodating two vehicles side by side. In some cases, an 18-foot-wide door may be used for added space and easier access. What is the cheapest way to replace a garage door? The cheapest way to replace a garage door is to opt for a basic steel door and handle the installation yourself, though this is not recommended due to the complexity. If you need professional installation, compare quotes from several contractors and consider off-season pricing for potential discounts. What is the least expensive material for a garage door? Steel is generally the least expensive material for garage doors, making it a popular option for garage door repair. Basic steel doors are affordable, durable, and low maintenance. However, they offer limited insulation, so if you need better energy efficiency, consider insulated steel doors or other materials, which will be more expensive. Conclusion Replacing a 2-car garage door can range from a few hundred to several thousand dollars, depending on the material, installation complexity, and additional features you choose. By understanding the factors that influence the cost and taking the time to shop around, you can find a garage door that fits your budget and needs. Whether you’re looking for a simple, functional door or a customized design that enhances your home’s curb appeal, investing in a new garage door can be a worthwhile enhancement to your home. End Note Thank you for exploring our guide on the actual costs of replacing a 2-car garage door. At Alpha Garage Doors, understanding these costs upfront is crucial to making an informed decision that aligns with your needs and budget. Whether you’re drawn to the durability of steel, the elegance of wood, or the practicality of vinyl, our wide range of garage door services has you covered. We offer everything from garage door repair, maintenance, and installation to garage door openers, emergency repairs, and custom garage doors designed to fit your unique style and needs. Our services also extend to commercial properties, with specialized offerings like loading dock levelers. For more
Garage Door Won’t Close? Here’s the One Thing You’re Overlooking!
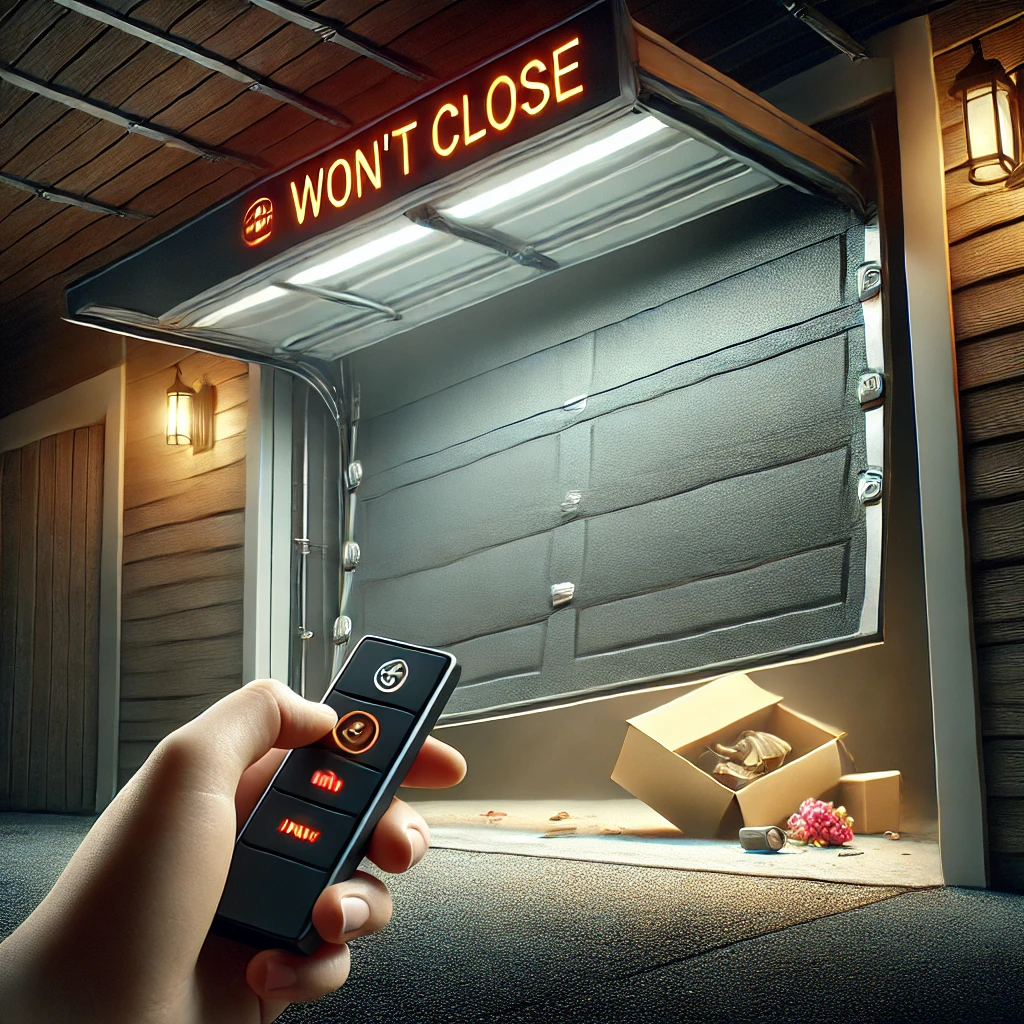
It’s a busy morning, and you’re ready to leave the house, but your garage door refuses to close. Suddenly, your plans are disrupted, and your home’s security is at risk. A malfunctioning garage door isn’t just a hassle—it’s a problem that needs quick attention to keep your home safe. In this guide, you’ll find seven straightforward methods to troubleshoot and fix a garage door that won’t close. From checking sensor alignment to inspecting the tracks and rollers, we’ll guide you through each step to help you identify and resolve the issue. These tips are designed to save you time and ensure your garage door operates smoothly again. If you’re dealing with a stubborn garage door, don’t worry—this blog provides clear, actionable steps to get things working again. Keep reading to learn more. 7 Effective Methods for Fixing a Garage Door That Won’t Close When your garage door won’t close, it’s important to systematically check for common issues that could be causing the problem. Here’s a detailed breakdown of each method to get your garage door back in working order. 1. Inspect and Align the Sensors Garage doors have safety sensors near the bottom of the door tracks. These sensors detect obstacles in the door’s path and prevent the door from closing if something is in the way. If your garage door won’t close, the first thing to check is whether the sensors are aligned and functioning properly. 2. Examine the Tracks and Rollers for Obstructions or Damage The tracks and rollers are essential components that guide the garage door as it opens and closes. Any obstruction, damage, or misalignment in these parts can prevent the door from closing properly. 3. Inspect the Trolley and the Chain Mechanism The trolley, attached to the chain or belt of your garage door opener, moves the door up and down. If the trolley is not properly engaged, your door may not close. 4. Test Your Remote Control If your garage door does not respond to the remote control, the issue may be with the remote itself rather than the door or the opener. 5. Adjust the Limit Screws on Your Opener Garage door openers have limit screws that control how far the door travels when opening and closing. If these screws are not set correctly, your door might stop short of closing fully or fail to open completely. 6. Refer to Your Garage Door Opener Manual If you’re still having trouble after checking the sensors, tracks, trolley, and remote, or if the issue persists, it might be time to consider garage door repair. Consult the manual that came with your garage door opener for specific troubleshooting advice, diagrams, and instructions tailored to your model. 7. Manually Close Your Garage Door (As a Temporary Solution) If you’ve tried everything and your garage door still won’t close, you can manually close the door as a temporary solution until the problem is resolved. Frequently Asked Questions (FAQs) How do I fix my garage door that won’t close? If your garage door doesn’t close, check the sensors to ensure they are aligned and free from obstructions. Also, inspect the tracks for debris and ensure the door is balanced. If the issue persists, try resetting the garage door opener or consult a professional for further diagnosis. Why is my garage door not closing and blinking? A garage door that won’t close and is blinking usually indicates a sensor issue. The blinking light suggests that the safety sensors are either misaligned or blocked by something, preventing the door from closing. Check the sensors and ensure they are clean, aligned, and properly connected. Why does my garage door keep going back up after closing? If your garage door keeps going back up after closing, it might be due to an obstruction detected by the safety sensors, or the door might not be properly balanced. The opener’s force limit setting might also need adjustment. Check these components or consult a professional if necessary. Why does my garage door click and not close? A clicking sound without the door closing often indicates an issue with the safety sensors or a malfunctioning opener. The sensors may be misaligned or dirty, or the opener’s motor may struggle to operate. Inspect these elements and consider a professional check if the problem continues. How do I manually close a garage door? To manually close a garage door, disconnect the door from the opener by pulling the emergency release cord. This will allow you to lower the door manually. Ensure you have a firm grip on the door and carefully lower it to the ground, then re-engage the opener if needed. Conclusion A new garage door that won’t close can be frustrating, but with these seven methods, you can troubleshoot and often fix the issue yourself. Start with the simplest solutions, like checking the sensors and remote batteries, and work through the list. If you find that the problem persists or if you’re uncomfortable with any of the steps, it’s always best to contact a professional garage door technician. Regular maintenance, such as cleaning the tracks and lubricating the rollers, can also help prevent these issues from occurring in the first place, ensuring your garage door operates smoothly and reliably. End Note Thank you for reading our blog, “Garage Door Won’t Close? Here’s the One Thing You’re Overlooking!” At Alpha Garage Doors, we understand how frustrating it can be when your garage door refuses to cooperate, especially during those busy mornings when every second counts. Whether you need a quick repair, regular maintenance, or a full garage door installation, we’re here to help. Our residential services include garage door repair, maintenance, installation, openers, emergency repairs, and even custom garage doors tailored to your unique style and needs. For our commercial clients, we offer top-tier garage door repair, maintenance, installation, and loading dock levelers. Feel free to explore more about what we do by visiting our website at Alpha Garage Doors. Check out our detailed service offerings at
Garage Door Off Track? Don’t Panic—Fix It in 8 Easy Steps!
A garage door that suddenly goes off track can quickly become frustrating, leaving you wondering how to fix it and prevent further damage. Beyond being a hassle, an off-track garage door is also a safety hazard that needs immediate attention. Understanding how to get your door back on track—and knowing why it derailed in the first place—can save you time, money, and potential injuries. In this guide, we’ll take you through the step-by-step process of fixing a garage door that’s come off its track so you can restore it to smooth operation. We’ll also delve into six common reasons why garage door rollers derail, from misaligned tracks to impact damage, helping you prevent future issues. Plus, we’ll share tips on maintaining your garage door system and when it might be time to call in a professional. If your garage door has gone off the rails, don’t panic—keep reading to learn how to safely and effectively fix the problem and get your garage door back on track quickly. How to Fix a Garage Door Off Track: Step-by-Step Guide When your garage door goes off track, it’s essential to address the issue promptly to prevent further damage and ensure safety. Follow this detailed guide to safely and effectively get your garage door back on track. Step 1: Disconnect the Garage Door Opener The first step is disconnecting the garage door opener to prevent accidental movement while you’re working. Locate the emergency release cord, usually a red handle hanging from the opener, and pull it to disconnect the door from the opener. This ensures the door won’t suddenly open or close, which could cause injury or additional damage. Step 2: Secure the Door With the opener disconnected, manually lower the door until fully closed. Use locking pliers or a clamp to secure the door to the track. This will prevent the door from moving while you work on it, keeping it stable as you inspect and repair the issue. Step 3: Inspect the Garage Door System Before making any repairs, thoroughly inspect the entire garage door system. Start by examining the tracks for visible damage, such as bends, cracks, or misalignment. Even slight damage can cause the rollers to derail, leading to more severe issues. Next, check the rollers for signs of wear, such as cracks in plastic rollers or flat spots on metal ones, which can prevent them from moving smoothly along the track. Also, inspect all the hardware, including brackets and screws, to ensure everything is tight and secure. Loose or missing hardware can cause the tracks to shift, increasing the risk of derailment. Step 4: Clear and Inspect the Tracks Inspect the tracks for debris or obstructions that could have caused the rollers to come off track. Dirt, small objects, or even accumulated dust can disrupt the smooth movement of the rollers. Clear any debris and carefully examine the tracks for any additional damage that might need to be addressed. If any rollers are broken or excessively worn, replace them to ensure smooth operation. Step 5: Realign the Track If you notice that the track is bent or misaligned, it will need to be realigned. Use a rubber mallet to tap the track back into place for minor misalignments gently. For more significant issues, you may need to loosen the bolts, secure the track to the wall, realign it carefully, and then retighten the bolts to hold the track correctly. Step 6: Guide the Rollers Back onto the Track With the track realigned, you can now guide the rollers back onto the track. Begin at the bottom of the door and carefully lift it while guiding each roller into the track. Take your time to avoid damaging the rollers or the track during this process. Step 7: Test the Door After the rollers are securely back on track, remove the locking pliers or clamp and reconnect the garage door opener. Test the door several times by opening and closing it to ensure it operates smoothly. Pay attention to any unusual noises or irregular movements that could indicate a lingering issue. Step 8: Perform a Final Safety Check Once the door is functioning properly, perform a final safety check. Ensure the door is balanced and the safety sensors are correctly aligned and working. This last step is crucial to confirm that the door is safe to use and that no further adjustments are needed. Six Common Reasons Rollers Derail Understanding why garage door rollers derail can help you prevent future occurrences and maintain the smooth operation of your garage door. Here are six common reasons rollers come off track: 1. Misaligned Tracks One of the most common causes of roller derailing is misaligned tracks. Over time, tracks can become loose or bent due to regular use, weather conditions, or minor impacts. When the tracks are not correctly aligned, the rollers cannot travel smoothly, leading to derailment. Regularly inspecting and tightening the track brackets can prevent this issue. 2. Damaged Rollers Garage door rollers endure a lot of wear and tear as they guide the door along the tracks. If they are damaged, cracked, or worn out, rollers can easily slip off the track. Metal rollers can develop flat spots, while plastic rollers can crack or break. Replacing damaged rollers promptly can help maintain the door’s alignment and smooth operation. 3. Debris in the Track Debris, such as dirt, leaves, or small objects, can accumulate in the garage door tracks over time. This debris can obstruct the rollers’ path, causing them to jump the track. Regularly cleaning the tracks and removing debris can prevent this and keep your garage door operating smoothly. 4. Loose or Broken Hardware The hardware that holds your garage door system together, including brackets, bolts, and screws, can loosen or break over time. If these components become loose, the track may shift out of alignment, leading to a derailment. Periodically checking and tightening all hardware components can help prevent this issue. 5. Impact Damage Accidents happen—whether it’s
How to Replace Garage Door Spring Without Losing a Finger—A Must-Read!
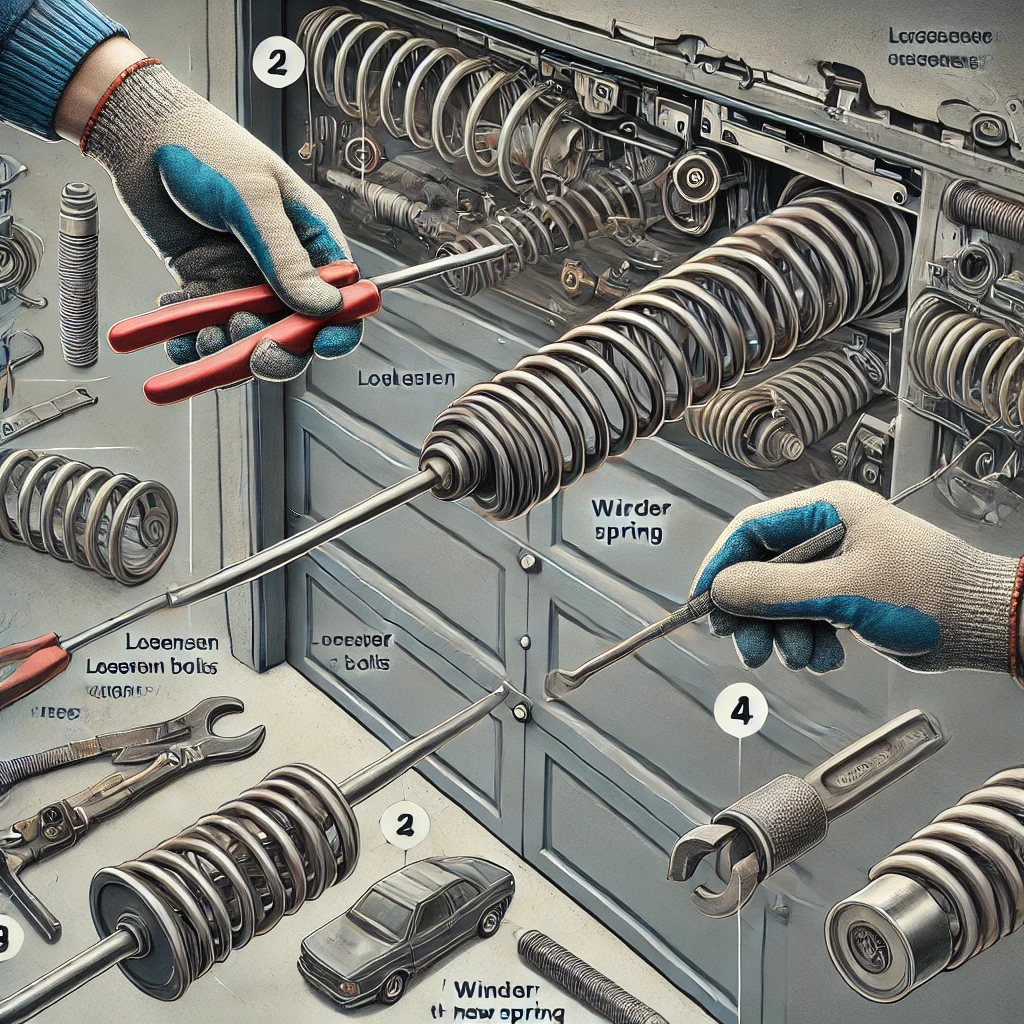
Dealing with a broken garage door spring can feel like your house suddenly holds your car hostage. Everything’s working fine one minute, and the next, your garage door refuses to budge, leaving you stuck outside (or worse, trapped inside). It’s one of those home maintenance challenges that sneaks up on you but can’t be ignored—after all, who wants to park outside? Replacing a garage door spring isn’t just about getting your door moving again; it’s about doing it safely and efficiently. These springs pack a punch with the tension they hold, and a wrong move could turn a simple fix into a risky DIY disaster. But don’t worry—we’re here to walk you through the process, step by step, with everything you need to know, from identifying the signs of a worn-out spring to safely replacing it without ending up in the ER. So, stick around if your garage door is acting more like a wall than a gateway. We’ll break down the tools, techniques, and tips you need to get your door back on track. Whether you’re a seasoned DIYer or just someone tired of manually lifting that heavy door, this guide has you covered. Types of Garage Door Springs Understanding the type of spring your garage door uses is crucial before attempting any replacement. There are two main types of garage door springs: extension springs and torsion springs. Extension Springs Extension springs are usually above the horizontal tracks on both sides of the garage door. These springs stretch and contract to counterbalance the door’s weight, helping it open and close smoothly. They are typically used in smaller or lighter garage doors. Torsion Springs Torsion springs are mounted above the garage door on a metal shaft. These springs work by twisting and coiling to generate the necessary tension to lift the door. Torsion springs are commonly found in heavier and larger garage doors because they provide more control and balance during operation. Signs Your Garage Door Springs Need Replacement Recognizing the signs that your garage door springs need replacement can prevent further damage to your garage door system and ensure your safety. Visual Indicators A visible break or gap in the spring is one of the most obvious signs that your garage door springs need to be replaced. Over time, springs can become worn and eventually snap due to their constant tension and pressure. Rust, excessive wear, or corrosion indicate that the springs are deteriorating and may fail soon. Garage Performance Issues If your garage door struggles to open or close, moves unevenly, or makes unusual noises, the springs may be the culprit. Springs that are losing tension or have broken will cause the door to operate inconsistently, and you might find it difficult to lift the door manually, which is a clear sign that the springs are no longer functioning properly. Safety Considerations for DIY Garage Spring Replacement Replacing garage door springs is a dangerous task that requires proper safety precautions to avoid injury. Here are some key safety considerations: Protective Gear Always wear protective gear, including safety glasses and gloves, when working on garage door springs. The tension in these springs is considerable, and a sudden release can cause serious injuries. Ensure you have the appropriate tools and equipment to handle the job safely, and only attempt to replace springs with understanding the risks involved. How To Replace Extension Springs on a Garage Door Replacing extension springs is generally more straightforward than torsion springs but still requires caution and precision. Here’s how to do it: Tools and Equipment Needed Before you begin, gather the necessary tools and equipment: Measure and Purchase New Springs Measure your old springs’ length and weight capacity (usually marked on the spring). To ensure proper operation, it’s essential to buy replacement springs that match these specifications. Mismatched springs can cause balance issues and may lead to further damage. Installing New Extension Springs How To Replace Torsion Springs on a Garage Door Torsion springs are more complex to replace and require more specialized tools. Here’s a step-by-step guide: Tools and Equipment Needed You’ll need the following tools and equipment: Measure and Buy New Springs Measure the length, wire size, and inside diameter of your old torsion springs. This information is crucial when purchasing new springs, as incorrect specifications can lead to dangerous situations. Installing New Torsion Springs Troubleshooting Common Issues After Garage Spring Replacement After replacing your garage door springs, you may encounter some issues that need troubleshooting. Here are common problems and their solutions: Garage Door Balance Problems If your garage door isn’t balanced after replacing the springs, it may be due to incorrect spring tension or uneven installation. Check the balance by manually lifting the door halfway—if it stays in place, it’s balanced. You’ll need to adjust the spring tension if it moves up or down. Spring Tension Adjustments Adjusting the tension on torsion springs requires winding bars and careful attention to detail. If the door isn’t opening or closing smoothly, add or release a quarter turn of tension on the springs until the door operates correctly. When To Call a Professional for Your Garage Replacing garage door springs can be risky, and there are situations where it’s best to call in a professional. Complex Installation Scenarios Hiring a professional is safer if your garage door has multiple springs and a unique setup, or if you’re unsure about any aspect of the replacement. They have the experience and tools to handle complex installations safely. Safety Concerns If you don’t feel confident in replacing the springs safely, don’t hesitate to call a professional. The risks associated with spring replacement are significant, and a professional can ensure the job is done correctly without injury. Maintenance Tips To Extend Garage Spring Life Regular maintenance can help extend the life of your garage door springs and prevent unexpected failures. Regular Garage Inspections Inspect your garage door springs regularly for wear, rust, or damage. Catching issues early can prevent the need for more extensive repairs or replacements
Why Every Homeowner Is Switching to the 16×8 Garage Door—And You Should Too!
A 16×8 garage door, measuring 16 feet wide and 8 feet tall, is a popular and practical choice for homeowners with a two-car garage. It offers ample space for parking two vehicles side by side, providing ease of access and maneuverability, even for larger cars or SUVs. Beyond functionality, this size also enhances your home’s curb appeal, offering a wide canvas for various styles and materials that can complement your home’s exterior. In this guide, we’ll delve into the benefits of choosing a 16×8 garage door, explore the different styles and materials available, and provide tips on installation and maintenance. Whether you’re replacing an existing door or installing a new one, understanding the key considerations for this garage door size will help you make an informed decision that suits your needs and boosts the value of your home. Keep reading to discover why the 16×8 garage door might be the perfect fit for your garage and expert tips on ensuring your door performs optimally for years. Why Choose a 16×8 Garage Door? The 16×8 garage door is ideal for double-car garages, measuring 16 feet wide and 8 feet high. Here’s why this size is a favorite among homeowners: Ample Space for Two Vehicles A 16×8 garage door provides sufficient space to park two vehicles side by side comfortably. Whether you own two sedans, SUVs, or a combination of vehicle types, this door size ensures that both vehicles can easily enter and exit the garage. The 8-foot height is advantageous for taller vehicles like trucks, vans, or vehicles with roof racks, offering ample clearance. Enhanced Curb Appeal The size and design of your garage door significantly impact your home’s curb appeal. A 16×8 garage door offers a wide canvas for various styles, materials, and finishes, allowing you to choose a look that complements your home’s exterior. Whether you prefer a modern, sleek design or a more traditional appearance, this door size provides the space to make a strong visual statement. Improved Functionality Functionality is a key consideration when choosing a garage door, and the 16×8 size delivers. The wider door allows for easier vehicle access and reduces the risk of scraping or damaging your car’s sides when entering or exiting the garage. Additionally, the larger door size means fewer structural barriers, making moving large items like furniture, equipment, or appliances in and out of your garage easier. Versatility and Flexibility A 16×8 garage door is versatile enough to accommodate various garage layouts and designs. Whether your garage is attached or detached or used solely for parking or as a multipurpose space (such as a workshop, storage area, or even a home gym), this door size offers the flexibility to meet your needs. The height also allows for adding high-lift or vertical-lift systems, which is ideal if you need more overhead space. Choosing the Right 16×8 Garage Door Style Selecting the right style for your 16×8 garage door enhances your home’s functionality and appearance. Here are some popular options to consider: Traditional Raised Panel The traditional raised panel garage door is a classic choice that complements various architectural styles. Its symmetrical, rectangular panels add depth and dimension to your home’s exterior. This versatile option works well with brick and siding facades. Carriage House Style Carriage house garage doors are designed to resemble the look of old-fashioned carriage doors that swing open. While these doors operate with modern overhead technology, they bring a touch of rustic charm and elegance to your home. Often featuring decorative hardware like handles and hinges, this style is perfect for homes with a country, craftsman, or cottage aesthetic. Contemporary Modern A contemporary garage door is an excellent choice for homeowners with a modern or minimalist home design. These doors often feature clean lines, large glass panels, and sleek materials like aluminum or steel. The 16×8 size allows for expansive glass panels, adding natural light to your garage and creating a striking visual effect. Custom Designs If you have a specific vision for your garage door that doesn’t fit into standard styles, consider opting for a custom design. Custom 16×8 garage doors can be tailored to match your home’s unique architecture, using a combination of materials, colors, and finishes to create a one-of-a-kind look. Custom designs offer endless possibilities, whether you want a door with intricate woodwork, bold colors, or a unique pattern. Material Choices for Your 16×8 Garage Door The material you choose for your 16×8 garage door will affect its durability, maintenance requirements, insulation properties, and overall appearance. Here are some popular materials to consider: Steel Steel is one of the most durable and low-maintenance materials for garage doors. It’s resistant to dents, weathering, and corrosion, making it an excellent choice for long-lasting performance. Steel doors are available in various finishes and can be insulated to improve energy efficiency. They’re versatile, ranging from smooth, modern surfaces to textured, wood-grain finishes. Wood Wood garage doors offer natural beauty and a timeless appeal that’s hard to match. Wood doors can be stained or painted to complement your home’s exterior, whether made from cedar, redwood, or other hardwood. While wood requires more maintenance than other materials—such as regular sealing or painting to prevent warping or rot—it provides a warm, inviting look that enhances any home’s curb appeal. Aluminum Aluminum garage doors are lightweight, resistant to rust, and can be designed with large glass panels for a modern appearance. While aluminum is less durable than steel, it’s an excellent choice for homeowners looking for a sleek, contemporary look. Insulated aluminum doors are also available, providing improved thermal performance. Fiberglass Fiberglass garage doors offer a good balance between durability and low maintenance. They’re resistant to dents, corrosion, and the effects of salt air, making them ideal for homes in coastal areas. Fiberglass doors can mimic the appearance of wood while being more lightweight and easier to maintain. However, they may not insulate as well as other materials. Vinyl Vinyl garage doors are another low-maintenance option, offering resistance to dents, cracking, and
Garage Door Width: Is Yours Too Small? Find Out Now!
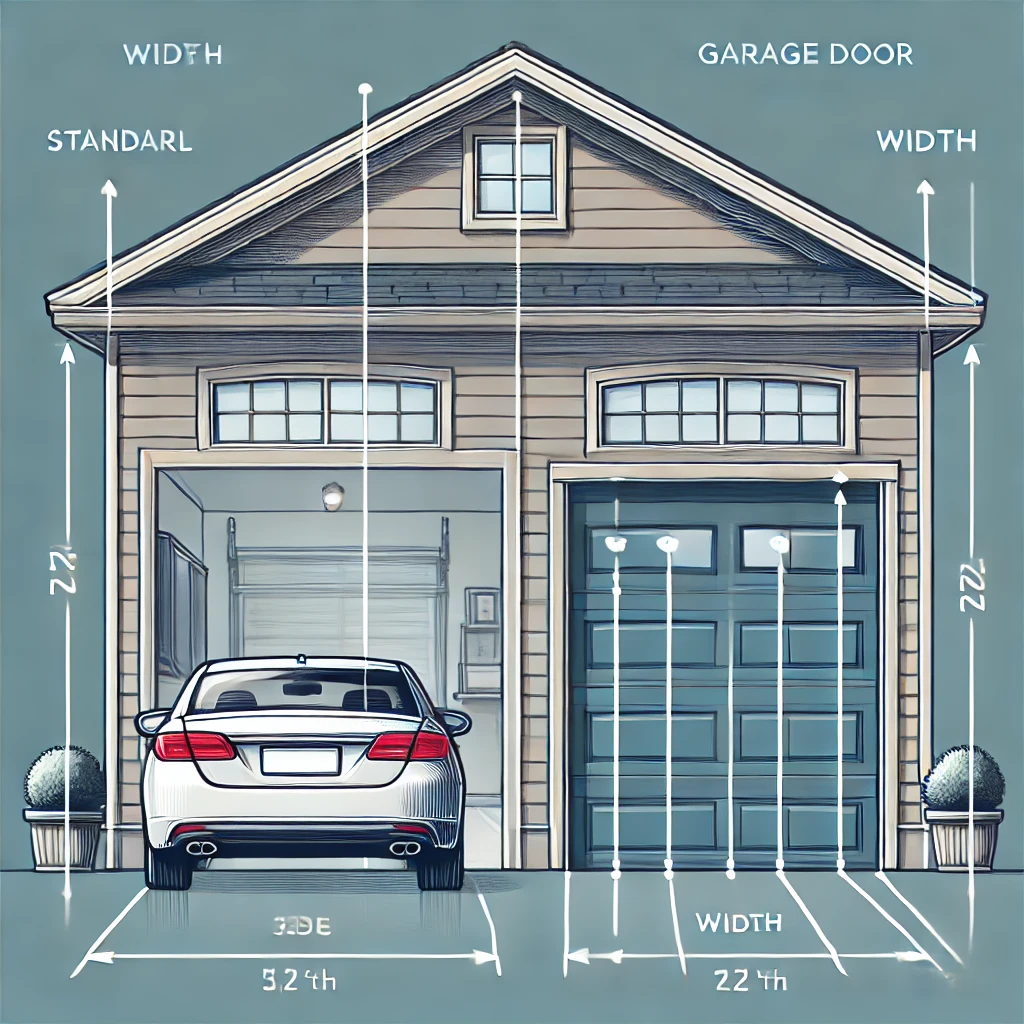
Choosing the right garage door width is a crucial decision that affects both the functionality of your garage and the overall look of your home. Whether you park a single vehicle or accommodate multiple cars, the width of your garage door must align with your space, vehicle size, and future needs. This guide delves into the standard garage door widths, how to measure for a new door, and tips for selecting the ideal width based on your specific requirements. We’ll explore what works best for different setups and preferences, from the common 8-foot and 9-foot single-car doors to the more spacious 16-foot double-car doors. Keep reading to discover how to choose the perfect garage door width. This width balances aesthetics with practicality, ensuring a seamless fit for your home and a hassle-free experience every time you drive in or out. Understanding Standard Garage Door Widths Garage doors come in a range of standard widths designed to accommodate various vehicles and garage setups. Here’s a breakdown of the most common sizes: Single-Car Garage Doors Double-Car Garage Doors Custom Garage Doors If your garage has unique dimensions or if you have specific needs that standard sizes can’t accommodate, custom garage doors are a viable option. Custom doors can be made to any width and are particularly useful for garages with irregular shapes or those needing a door that can handle oversized vehicles like RVs or boats. How to Measure Your Garage Door Width Accurate measurements are crucial when selecting a new garage door. A precise fit ensures the door functions smoothly, provides adequate clearance, and enhances the overall appearance of your home. Here’s a step-by-step guide to help you measure your garage door width correctly: Step 1: Clear the Area Before you begin measuring, it’s essential to clear the area around the garage door. Remove any vehicles, tools, or other items that might obstruct your view or interfere with your ability to take accurate measurements. A clutter-free space ensures you can measure the entire opening width without hindrance, giving you the most precise reading possible. Step 2: Measure the Opening Width Using a tape measure, carefully measure the width of the garage door opening from one side to the other. This measurement should be taken from the inside of the door frame at the widest point, as walls can sometimes be uneven or have slight variations. Ensure the tape measure is level and straight to avoid any inaccuracies. Record the measurement to the nearest inch, as even a slight discrepancy can affect the door’s fit and operation. Step 3: Consider the Frame In addition to measuring the opening itself, it’s essential to account for the width of the garage door frame. The frame includes the space between the edge of the opening and the surrounding wall, and it plays a crucial role in the overall installation. Measure both the left and right sides of the frame to determine if there’s enough room to accommodate the tracks, springs, and other hardware. This step ensures that your new door will fit snugly within the available space without any adjustments or modifications. Step 4: Double-Check Measurements Accuracy is key when measuring for a new garage door. Double-check all the dimensions you’ve recorded to ensure that your measurements are precise. Measure each dimension at least twice to confirm consistency. If there are any discrepancies, remeasure until you are confident in the accuracy. If you need clarification on any aspect of the measurement process, consider enlisting a professional to measure the space. Professional measurements provide peace of mind and prevent potential issues during installation. Choosing the Right Garage Door Width Selecting the correct width for your garage door depends on several factors, including the size of your vehicle, the layout of your garage, and your personal preferences. Here are some tips to help you choose the right width: Consider Your Vehicle Size An 8—or 9-foot wide door may be sufficient if you have a standard-sized vehicle. However, driving a larger vehicle like an SUV, truck, or van might require a wider door. Remember that wider doors offer more room for maneuvering, which can be especially important if your garage is narrow or you have limited clearance on either side of the door. Think About Future Needs When selecting a garage door width for your garage door repair, consider your future needs as well. If you plan to upgrade to a larger vehicle or anticipate needing more storage space in your garage, opting for a wider door now can save you the hassle of upgrading later. Additionally, wider doors can make it easier to add features like a workbench, shelving, or bike racks along the sides of your garage. Evaluate Your Garage Layout The layout of your garage plays a significant role in determining the appropriate door width. A narrower door might be necessary if your garage is narrow or has obstructions like pillars or storage areas along the walls. On the other hand, if you have a spacious garage with plenty of room on either side, a wider door could enhance the usability of the space. Balance Aesthetics and Functionality While functionality is crucial, don’t overlook the aesthetic impact of your garage door. A door that’s too wide for your home’s proportions can look out of place, while a door that’s too narrow might not provide the visual impact you desire. Consider your home’s overall design and choose a door width that complements its style while meeting your practical needs. Additional Considerations for Garage Door Width Insulation and Climate Control The width of your garage door can also affect its insulation properties. Wider doors often have more panels and joints, increasing heat loss if not properly insulated. If you live in a region with extreme temperatures, consider investing in an insulated garage door that provides better climate control and energy efficiency. Garage Door Opener Compatibility Ensure that your garage door opener is compatible with the width of your door. Wider and heavier doors require more powerful
4 Jaw-Dropping Reasons Garage Door Height Is More Important Than You Think!
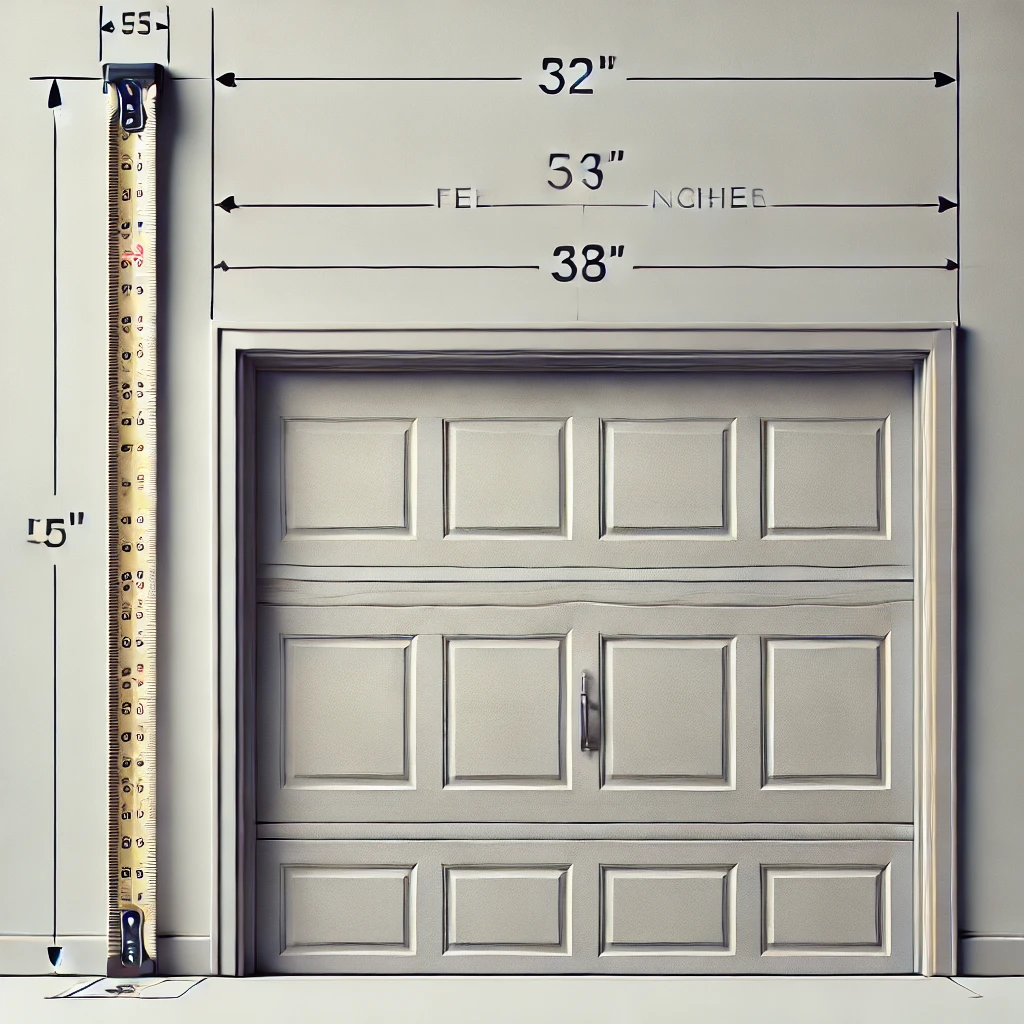
Selecting the right garage door height enhances your home’s functionality, security, and overall appearance. Whether you’re installing a new door or replacing an existing one, understanding the standard sizes and how to measure your space accurately ensures that your garage door fits perfectly and operates smoothly. In this guide, we’ll explore the standard sizes for single- and double-car garage doors, discuss why choosing the correct height is essential, and provide detailed instructions on measuring your garage door opening. We’ll also cover additional considerations like headroom, obstructions, and material choices that can impact your decision. Keep reading to learn everything you need to know about garage door height. This information will help you make an informed choice that complements your home’s style and meets your practical needs. What Are the Standard Garage Door Sizes? Garage doors come in various sizes to suit different garage types, vehicle sizes, and homeowner preferences. Understanding the standard garage door sizes will help you make an informed decision: Should You Replace or Repair Your Garage Door? Deciding whether to replace or repair your garage door is an important consideration that depends on several factors. Here’s a detailed look at what you should consider: Why Garage Door Size Matters: Four Key Reasons Ensuring Proper Fit and Functionality Selecting the correct garage door size ensures the door fits within the frame and operates smoothly. A door that is too small may leave gaps that allow water, debris, or pests to enter, while a too-large door can be difficult to install and may not fit properly within the opening. Proper sizing ensures that your door operates efficiently, providing a snug fit that protects your garage’s contents and maintains its structural integrity. Enhancing Aesthetic Appeal Your garage door plays a significant role in your home’s curb appeal, as it’s often one of the most prominent features visible from the street. Choosing a door proportionate to your home’s facade enhances the overall aesthetic and creates a harmonious look. A well-sized door that complements your home’s architectural style—whether modern, traditional, or rustic—can significantly increase its visual appeal and market value. Boosting Insulation and Energy Efficiency A garage door that fits perfectly within its frame is essential for maintaining insulation and energy efficiency. Gaps around the door can cause drafts, leading to temperature fluctuations in your garage and affecting the comfort of adjacent rooms. Over time, this can increase your energy bills as your HVAC system works harder to maintain a stable indoor temperature. Choosing the right size and an insulated door can improve your home’s overall energy efficiency, making it easier to control heating and cooling costs. Maximizing Safety and Security A correctly sized garage door is crucial for ensuring the safety and security of your home. A door that doesn’t fit properly may not close fully, leaving your garage vulnerable to intruders. Also, improper sizing can lead to mechanical issues, such as the door becoming stuck or misaligned, posing safety hazards. By selecting the right size, you ensure your garage door is secure and functions smoothly, protecting your belongings and family. How to Measure Your Garage Door for the Perfect Fit Accurate measurements are essential when ordering a new garage door. Here’s a step-by-step guide to help you measure your garage door opening: Step 1: Measure the Width Start by measuring the width of the garage door opening from the inside of one side to the other. Use a tape measure and measure at the widest point. If your garage walls are uneven, take multiple measurements to ensure accuracy. Record the largest measurement to ensure the door will fit properly. Step 2: Measure the Height Next, measure the height of the garage door opening from the floor to the top of the door frame. As with the width, measure at the tallest point to account for any irregularities in the floor or ceiling. Accurate height measurements ensure the door closes entirely and operates smoothly. Step 3: Measure the Side Room and Headroom The side room refers to the space between the edge of the garage door opening and the wall. Measure both sides to ensure enough room for the tracks and springs. Typically, you’ll need at least 3.5 inches on each side. Headroom is the space between the top of the door opening and the ceiling. This area is essential for the door’s track system and the garage door opener. Standard doors require at least 10 to 12 inches of headroom, but low-clearance options are available if your space is limited. Additional Considerations When Measuring a Garage Door Opening Checking for Obstructions Before installing a new garage door, inspect the area for any obstructions that could interfere with its installation or operation. Common obstructions include pipes, electrical outlets, light fixtures, and storage shelves. These may need to be relocated or adjusted to ensure the garage door repair or installation can be completed properly and operate without hindrance. Taking Note of the Floor Slope If your garage floor slopes intentionally for drainage or due to settling, it can affect how the door sits when closed. Measure the slope by checking the difference in height at various points along the floor. A significant slope may require adjustments during installation or a specialized bottom seal to prevent gaps when the door is closed. Other Factors to Consider Frequently Asked Questions (FAQs) What is the height of a standard garage door? The standard height of a garage door is 7 feet (213 cm), typical for most residential garages. This height accommodates standard vehicles like sedans, SUVs, and light trucks. Some homes may opt for an 8-foot door, especially if they have larger vehicles or require more clearance for overhead storage. What is the ideal height of a garage? The ideal height of a garage is around 9 to 10 feet. This provides enough clearance for most vehicles, including taller SUVs and trucks, and allows space for overhead storage or garage door openers. If you plan to install a car lift, a height of 12